domenica 25 agosto 2013

Opel Blitz

Ecco finalmente gli ultimi scatti del piccolo Blitz in scala 1\72.. manca ancora la targa.. che farò a breve e poi ci siamo.. almeno credo..


Here, finally, the last shots of the small scale Blitz 1 \ 72 .. still lack the plate .. I will do in the short and then we .. at least I think ..


lunedì 19 agosto 2013

Type 61

Ecco un nuovo piccolo passo sul piccolo carro della trumpeter in scala 1.72. Vi tento di illustrare i filtri.. in quale modo?  E cosacsic intende? Semplice.. eccone un passo passo..

Come per i lavaggi, è mia abitudine usare i colori ad olio. Per stendere al meglio gli olii si utilizza un pennellino per "picchiettare" il carro e tirare il colore..


Here's another small step on the little tank .. I did the filters .. in what way? simple .. here's a step by step .

So as you would use for washing oil colors .. I have used these in the picture .. Then you use a brush to "tap" the tank ..


Per prima cosa ho fatto dei puntini casuali sul carro con vari colori (dal giallo al blu)   Dopo aver aspettato un po' di tempo sono passato allo step successivo..


Then I made of random dots on the tank.. this is the beginning of the filters .. Then you have to wait a bit 'of time .. ten minutes and proceed to the next step ..


In questo step si "tirano" i puntini con acquaragia e un pennello inumidito, per movimentare la superficie. Da tener vicino un pennello e un cotton fioc per poter eliminare gli eccessi. 


Then you "pull" the dots with turpentine and a brush .


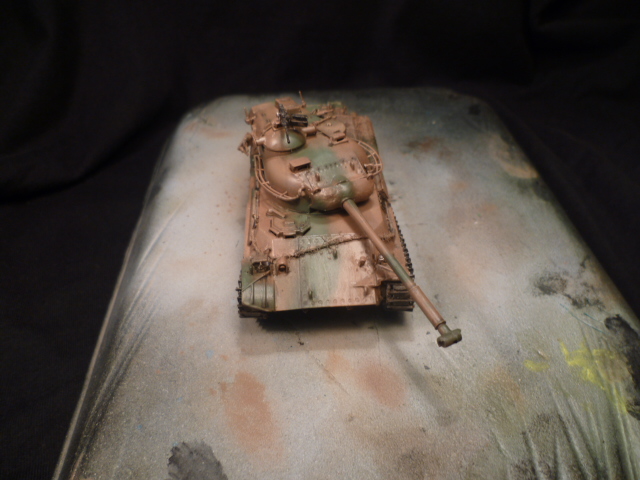
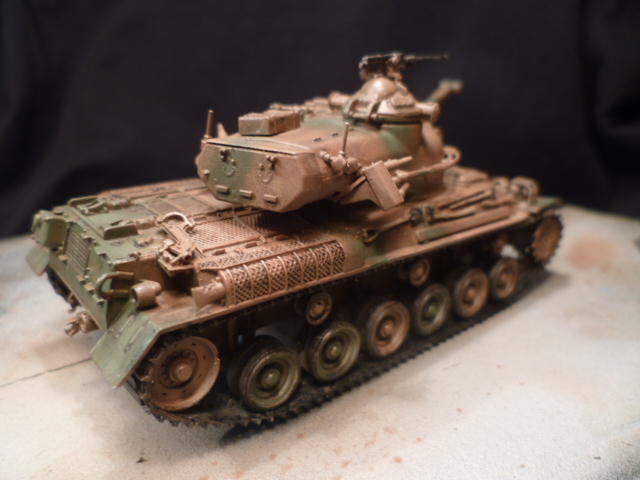
Ed ecco i risultati.. anche se non sono molto evidenti e non emergono troppo dalle foto.
Mi riprometto di rifare uno step by step con un carro più grande. 


And here are the results .. even if they are not very evident, serve to "revive" and move the color.


In sintesi il materiale necessario è:
Vari pennelli per stendere e tirare il colore, i colori ad olio e un cotton fioc per pulire le eccedenze. 
Spero sia statp utile, per qualsiasi dubbio non esitate a porre domande  

giovedì 15 agosto 2013

Type 61

Ecco un nuovo lavoro in cantiere.. si tratta di un carro moderno.. datato primi anni '60, in uso presso le forze giapponesi. Il carro è in scala 1\72 della trumpeter..


Vi riporto un piccolo wip (work in progress).

Partiamo dal Primer: un colore fondamentale che serve come base per il nostro mezzo.. serve anche per vedere eventuali errori in fase di montaggio!


Here is a new work in the yard .. it is a modern tank .. dated early 60s, used by the Japanese forces. The tank is in scale 1 \ 72 of the trumpeter ..


We carry a small wip (work in progress).

We start from the primer: a basic color that serves as the basis for our middle .. also serves to see any errors during assembly!


La base: colore di fondo e mimetica, fatti ad aerografo con colori tamiya!


The basic background color and camouflage, made ​​to airbrush with Tamiya colors!


E qui iniziamo con una parte fondamentale: i lavaggi.. prima un lavaggio generale.. con colore ad olio e acquaragia..

And here we start with a fundamental part: washing .. before a general washing .. with oil paint and turpentine ..


Tolto un po' di eccesso di colore con carta:


Removed a little 'color excess with paper:


Alla fine il carro risulta lucido.. ma alla fine (si spera) con l'opaco tutto si attenuerà..

Ed ecco dopo un lavaggio mirato.. fatto con il nero ad olio.. passato nei recessi e sui vari bulloni..


At the end of the tank is polished .. but eventually (hopefully) with the opaque everything will fade ..

And here after a wash targeted .. made with black oil .. in the recesses of the past and the various bolts ..


Dunque: abbiamo parlato di lavaggi.. Mirati (o selettivi) e generali.. come si fanno? Le tecniche sono varie ed ogni modellista trova la sua strada.. Io faccio in questo modo: colore ad olio diluito in acquaragia INODORE.. In un vasetto di vetro metto il colore ad olio, ci metto dell'acquaragia e poi giro tutto con il pennello.. uso un colore piuttosto diluito che viene passato su tutto il mezzo.. per iniziare a dare un'idea di invecchiamento e iniziare ad opacizzare (questo il lavaggio generale.. cosa che alcuni modellisti preferiscono non fare).. Poi sono passato al lavaggio mirato: stesso procedimento.. solo usando il nero e SOLO negli interstizi più profondi e sui vari bulloni e cose simili.. Dopo un po' ho rimosso il colore  in eccesso con un pennello.. in questa fase conviene utilizzare un pennellino (io ho usato un 10\0)..

Poi altra cosa.. prima di fare i lavaggi con acquaragia e co ricordatevi di spruzzare sul carro del trasparente lucido (io qui ho usato l'opaco) per fissare il colore di base!


So: we talked of washes .. Targeted (or selective ) and General .. how do you make ? The techniques are varied and any modeller finds its way .. I do it this way : oil paint thinned with turpentine ODORLESS .. In a glass jar put the oil color , I put turpentine and then turn around with the brush .. use a color rather diluted that is passed over the middle .. to start giving you an idea of ​​aging and dulling start (this is the general wash .. which some modelers prefer not to do) .. Then I switched to washing targeted : same procedure .. only using black and ONLY in the interstices deeper and the various bolts and things like that .. After a while ' I removed the excess color with a brush .. in this phase should use a small brush (I used a 10 \ 0) ..

Then another thing .. before doing the washing with turpentine and co remember to spray on the bandwagon of clear gloss ( here I 've used the opaque ) to secure the base color!


domenica 11 agosto 2013

Running for safety!

Ecco una piccola scenetta in scala 1\35.. i figurini sono della Verlinden mentre tutto il resto è autocostruito. Le macerie sono delle vere "macerie" prese in prestito da alcuni lavori svolti qualche anno fa in casa..


Here is a small scene in scale 1 \ 35 .. the figures are the Verlinden while everything else is homemade. The debris are real "rubble" borrowed from some of the work a few years ago at home ..