lunedì 25 novembre 2013

L'artista

Pezzi utilizzati:
-232 8 rad da scatola Tamiya;
-figurini Tamiya e modifiche;

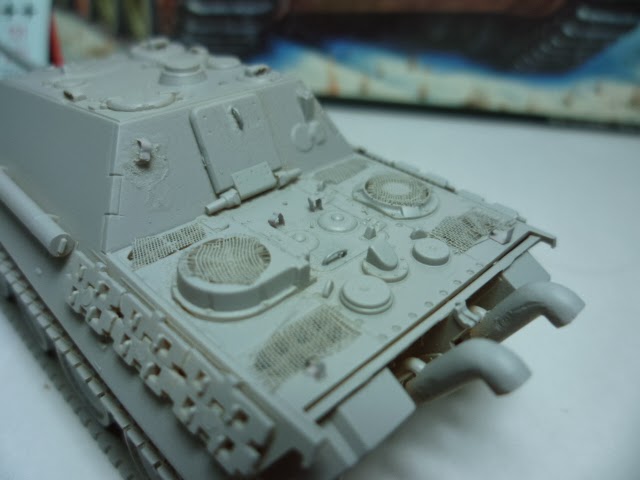
Ecco il mio ultimo pezzo in scala 1\48. Il modello in questione è l'8 Rad 232, un mezzo da ricognizione tedesco usato nel corso del secondo conflitto mondiale. Come riporta l'etichetta il mezzo è "ambientato" a Kursk (sede del più grande scontro tra carri armati di ogni tempo) nel 1943. Il colore usato, il dark yellow, simula il colore che fu impiegato dai tedeschi nel corso del 1943 e fino a fine guerra. In realtà, dopo numerose foto e articoli visti in rete e suggeriti anche dagli amici dei vari forum e dei social network, ho riscontrato che questo mezzo aveva una mimetica a due toni (quindi con le macchie verdi). Come fare?
Da qui è nata l'idea di questo pezzo.. La scena infatti mostra un figurino tedesco, un uomo dell'equipaggio, intento, sotto lo sguardo vigile del figurino in torretta, a applicare la mimetica. Ho cercato quindi di risolvere in questo modo. Va infatti ricordato che in quei periodi e soprattutto al fronte la mimetica si faceva con qualsiasi mezzo (anche le scope vecchie, come mi spiegava un amico!). Venendo alla parte tecnica il mezzo della Tamiya è montato completamente da scatola, senza alcuna aftermarket, cosi come i figurini.. solo quello con il pennello è stato trasformato. I colori utilizzati sono i Tamiya e i Vallejo per le divise dei figurini.

Per questo mezzo la lista delle persone da ringraziare è lunga, dagli amici del Model Club Roma, agli amici di Facebook.. Grazie a tutti!


Parts used :
-232 8 rad box from Tamiya ;
- Tamiya figures and changes ;

Here is my latest piece in scale 1 \ 48 . The model in question is the 8 Rad 232 , half German reconnaissance aircraft used during the Second World War. As reported by the label means is "set " in Kursk ( home to the largest clash between tanks of all time ) in 1943. The color used , the dark yellow , simulates the color that was used by the Germans in 1943 and until the end of the war. In fact, after having numerous photos and articles on the net and also suggested by the friends of various forums and social networks , I found that this medium had a two-tone camouflage ( then with the green spots ) . What to do?
Hence was born the idea for this piece .. The scene shows a figure in fact German, a man of the crew, intent , under the watchful eye appears in the turret, to apply the camouflage . So I tried to solve it this way. It should be remembered that in those times , and especially at the front camouflage was done by any means (even the old brooms , as I explained to a friend! ) . Coming to the technical part of the half Tamiya is assembled completely from the box, without any aftermarket , as well as the figures .. only the one with the brush has been transformed. The colors used are Tamiya and Vallejo for the uniforms of the figures.

By this means the list of people to thank is long , friends of the Model Club Rome, to Facebook friends .. Thank you all!


domenica 24 novembre 2013

Jagdpanther W.I.P.

Ecco ancora un piccolo step con il colore di base. Ho ancora molto da lavorare. Ho usato il colore Xf-60 della Tamiya.. Ora due possibilità: modulazione o inizio della livrea e poi modulazione.
Seguitemi e vedrete la decisione..

Here another step with base color. I must work for finish this tank.I used Xf-60 Tamyia.. Now I have two different possibility: start modulation or start camouflage and after modulation.
Follow me and You will see decision..


lunedì 18 novembre 2013

Diorama Italia '44 W.I.P.

Ed ecco un altro passo nella realizzazione di questo diorama.. Parliamo della costruzione del muro.. Realizzato passo dopo passo.. con molta pazienza!

And here's another step in the realization of this diorama .. We talk about the construction of the wall .. Achieved step by step .. with a lot of patience!


E per ultimo aggiornamento di oggi, vi mostro la casa che utilizzerò.

And for last update today, i show you the house that i will use.


lunedì 11 novembre 2013

Jagdpanther Late

Ciao a tutti,

ecco un altro passetto sul carro.. Ho dato una mano di primer:


Hello to all,

here's another small step on the tank.. I gave it a coat of primer:


Sono riuscito grazie agli amici del club a capire le varie versioni e co..

Ho provato a modificare e ricostruire delle parti.. ci sono ancora alcuni errorini, ma lascio perdere..


I managed thanks to the friends of the club to understand the various versions and co ..

I tried to modify and rebuild the parts .. there are still some "problems", but I let it go ..


Ma veniamo ai particolari ricreati:

ricostruite le griglie;
le varie maniglie;
i vari ganci come dai profili presi in considerazione;
tolti dei pezzi qui e li;
bucati i visori in torre;
ricostruito il filo del faro anteriore;
i ganci laterali dove andrebbero agganciati i cavi di traino;


e mi pare sia tutto...


But we come to the details recreated:

reconstructed grids;
the various handles;
the various hooks as from the profiles taken into account;
removed the pieces here and there;
Punched viewers in the tower;
rebuilt the thread of the headlamp;
the side hooks should be attached where the tow ropes;


and I think that's all ...


giovedì 7 novembre 2013

Jagdpanther Late

Ecco delle foto con "l'effeto peso" sui cingoli!


Here are some pictures with the "weight effects" on it's tracks!


mercoledì 6 novembre 2013

Jagdpanther Late

Ecco il mio ultimo lavoro..

Si tratta del kit Revell in scala 1\72, montato da scatola. Ci siamo quasi manca solo la pittura. Vi allego le immagini del montaggio.


Here is my latest work ..

This is the kit Revell in scale 1 \ 72, mounted to the box. We're almost there just missing painting. I am attaching images of the installation.


Penso di fare questa mimetica.. Tratta da: "Jagdpanther" n. 83 di  Wydawnictwo militaria

I think I do this camouflage .. Taken from: "Jagdpanther" n. 83 of Wydawnictwo Militaria


sabato 2 novembre 2013

Diorama Italia '44 W.I.P.

Ed ecco un ulteriore passo in avanti. Si inizia a delineare e capire bene i pezzi che comporranno il nostro diorama.

And here is another step forward. It begins to outline and understand the pieces that compose our diorama.